
Get zk verified tasks right
Before you start earning, you need to understand that ZK verified tasks are not just another freelance gig. They require a specific setup to prove you completed work without revealing the work itself. Think of it like a locked envelope: the client gets proof the task is done, but never sees the contents. This privacy is powerful, but it adds a layer of complexity that can trip up beginners.
Start by choosing a platform that supports zero-knowledge verification. Not all freelance sites offer this, so you will need to look for specialized marketplaces or DAOs that prioritize privacy. Once you are on a platform, you must set up your cryptographic identity. This usually involves generating a key pair that links your wallet to your verified status. Keep your private key safe; losing it means losing access to your earnings and reputation.
Next, focus on the verification workflow. Most tasks require you to generate a ZK proof after completion. This proof is a small piece of data that mathematically confirms your actions were valid. You will need to understand the specific constraints of the task. For example, if the task is to process data, your proof must show the data was processed correctly without showing the data itself. This requires careful attention to the task’s technical specifications.
Finally, test your setup with small tasks before committing to large projects. This helps you identify any issues with your proof generation or submission process. It also builds your track record on the platform, which can lead to higher-paying opportunities. Remember that the goal is to balance privacy with verifiability. If your proof is too complex, it may fail validation. If it is too simple, it may not provide enough security. Find the right balance for each task type.
Work through the steps
Earning passive income with zero-knowledge (ZK) verified tasks requires a precise workflow. You must prove you completed a task without revealing the underlying data or code. This process protects your privacy and the employer’s proprietary information. Follow this sequence to submit valid proofs and get paid.
Before starting any gig, you need a compatible ZK proof generation tool. Install the necessary libraries for your chosen proof system (e.g., Circom, SnarkJS, or Halo2). Ensure your local environment matches the compiler versions specified by the task provider. Mismatched versions are the most common cause of failed proofs.
Identify what data must remain private (witnesses) and what must be public (inputs). For example, if you are verifying a transaction, the amount and hash might be public, while your wallet address is private. Clearly map these variables in your circuit logic. This step ensures the proof answers the employer’s question without leaking sensitive details.
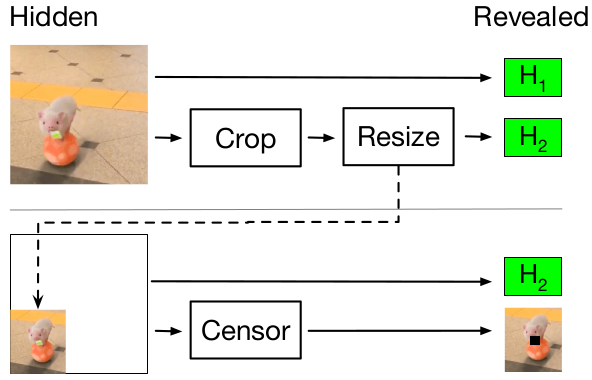
Run your circuit with the defined inputs and witnesses to generate the proof. This cryptographic process verifies that you followed the correct workflow without exposing the raw data. The output is a small proof file and a set of public inputs. Verify the proof locally using the verification key provided by the task platform to ensure it is valid before submission.
Upload the proof file and public inputs to the task platform. The platform’s verifier checks the proof against the circuit’s verification key. If the proof is valid, the smart contract releases payment automatically. Keep a record of the transaction hash for your records. This step completes the cycle, turning your computational effort into passive income.
-
Verify circuit compiler version matches provider specs
-
Confirm public inputs and private witnesses are correctly mapped
-
Run local verification before uploading to the platform
-
Save transaction hash for payment tracking
No comments yet. Be the first to share your thoughts!